High Protein Baking: The Complete Guide to Healthier Baked Goods
- High Protein Baking: The Complete Guide to Healthier Baked Goods
- Why Bother with High Protein Baking?
- Understanding How Protein Behaves in Baking
- Types of Protein for Baking: A Practical Guide
- The Golden Rules of High Protein Baking
- Common Mistakes to Avoid
- What You Can Make: A Tour of Protein Baking Possibilities
- Getting Started: Your Protein Baking Pantry
- Converting Your Favorite Recipes
- Master Recipe: The Everything Protein Muffin
- Your Next Steps: From Beginner to Confident Baker
- Building a Sustainable Protein Baking Practice
- A Final Thought on Protein Baking Philosophy
- Still Wondering? Your Questions Answered
- References
- Related Articles
Here’s the thing about high protein baking: it’s not as straightforward as swapping flour for protein powder and calling it a day. But once you understand a few key principles, you’ll be creating muffins, breads, cookies, and cakes that deliver 15-20 grams of protein per serving without sacrificing the textures and flavors you love.
This guide covers everything you need to know: the science behind how protein behaves when heated, which types of protein work best for different baked goods, the golden rules that prevent dry, dense disasters, and practical tips for converting your favorite recipes. Whether you’re team whey or team pea protein, whether you’re baking for muscle recovery or just trying to stay full until lunch, you’ll find what you need here.
Why Bother with High Protein Baking?
The appeal of high protein baked goods goes beyond just hitting your macro targets. Protein-rich foods keep you fuller longer, which means your mid-morning muffin or afternoon cookie might actually tide you over until your next meal instead of leaving you reaching for another snack an hour later[1]. This satiety effect comes from protein’s slower digestion rate and its influence on hunger hormones like ghrelin and peptide YY.
For active individuals, protein helps repair and build muscle tissue after workouts[2]. Getting 15-20 grams of protein from a post-workout protein pancake or recovery muffin is just more enjoyable than downing another shake. Plus, spreading protein throughout the day—including in snacks and treats—supports consistent muscle protein synthesis better than loading it all into one or two meals[3].
There’s also the practical angle. High protein baked goods travel well, can be made ahead in batches, and work for the whole family. A batch of high protein banana muffins feeds everyone breakfast for the week, from the toddler who needs protein for growth to the teenager recovering from soccer practice to the parent trying to fuel a busy workday.
Understanding How Protein Behaves in Baking
Before we dive into recipes and techniques, let’s talk about what actually happens when protein powder meets heat and moisture. This isn’t just academic—understanding the science helps you troubleshoot when things go wrong and modify recipes with confidence.
When you bake with regular flour, you’re working primarily with starch and gluten (in wheat flour). Starch gelatinizes when heated with moisture, while gluten provides structure and elasticity. Protein powder changes this dynamic entirely because protein behaves very differently from starch.
When proteins are exposed to heat during baking, they undergo denaturation—the complicated folded structure unravels into strands of amino acids. This is a physical change, not a chemical one. The weak bonds holding the protein’s complex shape break down, but the stronger peptide bonds that link amino acids together remain intact. The unraveled protein strands then stick together, forming a network or aggregate.
This is actually what gives structure to baked goods. Eggs, which are 10-15% protein, help bind ingredients together in cake batters for exactly this reason. When you add protein powder to your recipes, you’re amplifying this effect.
The Cahallenge?
Protein powder absorbs significantly more liquid than flour does. While wheat flour protein can absorb about two times its weight in water, native starch only absorbs about 0.3 times its weight. Protein powder, being concentrated protein, is even more absorbent. This is why adding protein powder to a recipe without adjusting the liquid content results in dry, dense, crumbly baked goods—the protein is essentially stealing moisture from the rest of your batter.
The second challenge is structure. Wheat flour develops gluten networks that provide elasticity and trap air bubbles. Protein powder doesn’t do this. In fact, whey protein and gluten don’t work well together—adding significant whey protein to vital wheat gluten can prevent proper gluten development and create a soupy batter instead of elastic dough.
Here’s the good news: research shows that baking may actually enhance protein digestibility. The denaturation process that occurs during cooking can make proteins easier for your body to break down and absorb. So you’re not “destroying” the protein or losing nutritional value—you’re potentially making it more bioavailable.
Types of Protein for Baking: A Practical Guide
Not all protein powders bake the same way. Each type has unique properties that make it better suited for certain applications. Here’s what you need to know about the most common options.
Whey Protein
Whey protein is the liquid byproduct of cheesemaking, processed into powder form[4]. It’s the most popular protein powder for baking, and for good reason—it’s widely available, relatively affordable, and has a mild flavor that works in most recipes.
Whey comes in three main forms:
- Whey Protein Concentrate (WPC): Contains 70-80% protein, plus some lactose and fat. It has a creamier taste and works well in baked goods.
- Whey Protein Isolate (WPI): 90%+ protein, with virtually no lactose or fat. More neutral flavor, slightly more expensive.
- Hydrolyzed Whey: Pre-digested for faster absorption. Not recommended for baking—it tastes bitter and doesn’t improve results.
Whey protein bakes very dry, so it requires more liquid ingredients and preferably some fat like butter. It mixes well and dissolves easily, so you may need less liquid than with other proteins, but you’ll still need to add moisture compensators beyond what a regular recipe calls for. Whey also browns quickly due to the Maillard reaction (the same reaction that browns toast), so you’ll often need to reduce baking time or temperature.
Best uses for whey: Muffins, pancakes, waffles, quick breads, and cakes. Its fine texture and mild flavor make it versatile.
Casein Protein
Casein is the other primary protein in milk, making up about 80% of milk’s protein content[5]. Unlike whey, which digests quickly, casein forms a gel in the stomach and digests slowly over several hours.
Casein is significantly more absorbent than whey protein, requiring much more liquid in recipes. It also lacks structure on its own, so you shouldn’t replace all the flour with casein. The upside? Casein helps retain moisture better than whey, making it excellent for no-bake treats and helping to prevent dryness in baked goods.
Many protein powders marketed for baking contain casein-whey blends. These blends combine the structural properties of whey with casein’s moisture retention, creating results that more closely resemble traditional baked goods.
Best uses for casein: No-bake protein bars, protein cheesecakes, overnight oats, and as part of a blend in muffins or cookies. It’s also great mixed with yogurt or cottage cheese for a protein boost.
Pea Protein
Pea protein is made from yellow split peas and is the most popular plant-based protein for baking[6]. It’s naturally gluten-free, lactose-free, and hypoallergenic, making it suitable for those with dairy or gluten sensitivities.
Pea protein is a complete protein containing all essential amino acids, though it’s slightly lower in methionine. Nutritionally, it holds its own against whey. Pea protein performs comparably to soy proteins in terms of solubility, emulsification, and water and oil holding, though it performs differently from whey protein in terms of solubility and gelling.
The biggest challenge with pea protein is flavor. Pea protein has an earthy, slightly bitter taste that pairs well with strong flavors like chocolate, peanut butter, banana, and coconut. Plant-based proteins are the most absorbent of all protein powders, making it tough to achieve light and fluffy textures—they work better in denser baked goods like brownies, energy bars, or hearty quick breads.
Best uses for pea protein: Chocolate brownies, peanut butter cookies, banana bread, protein pancakes (they actually create fluffier pancakes than whey), and any recipe with bold flavors that can mask the earthiness.
Rice, Soy, and Hemp Proteins
Rice protein creates a grainier texture but works surprisingly well in cookies and biscotti where a slight crumbliness is expected[7]. It’s mild in flavor and easily digestible.
Soy protein has a nutty flavor that goes undetected in many baked goods. It has similar functional properties to pea protein and is also a complete protein[8]. Some people avoid soy due to allergies or dietary preferences.
Hemp protein has a distinctive nutty, earthy flavor and contains more fiber than other proteins[9]. It works well in rustic breads, hearty muffins, and granola bars. The fiber content means you’ll need even more liquid in recipes.
Which Should You Choose?
For beginners: Start with whey protein concentrate (or vanilla whey isolate if you want a flavor boost). It’s the most forgiving and widely available.
For plant-based bakers: Pea protein isolate is your best bet. Choose chocolate or vanilla flavored for easier integration, or unflavored if you’re comfortable working with strong-flavored recipes.
For advanced bakers: Experiment with blends—combining whey with casein or mixing pea with rice protein often yields better results than using a single protein source.
For specific textures: Use rice protein for crumbly cookies, casein for moist no-bake treats, and pea protein for fluffy pancakes.
The Golden Rules of High Protein Baking
After extensive testing (and yes, many hockey-puck failures), these principles consistently lead to success:
Rule #1: Never Replace More Than 1/3 of the Flour
You should never replace more than 1/3 of the flour with protein powder, and ideally you should aim for just 1/4 replacement. Anything more leads to dry, dense results because you’re losing the structural properties of flour (starch gelatinization, gluten formation) without adequate compensation.
In practice: If your recipe calls for 2 cups of flour, use 1½ cups flour + ½ cup protein powder (that’s a 1/4 substitution). For a more protein-forward result, use 1⅓ cups flour + ⅔ cup protein powder (that’s the maximum 1/3 substitution).
Rule #2: Add Significant Extra Moisture
For every cup of dry ingredients (including protein powder), add ¼ to ½ cup of wet ingredients beyond what the recipe normally calls for. The best moisture compensators are:
- Greek yogurt or cottage cheese: Adds protein, creaminess, and tanginess. Works in nearly everything.
- Mashed banana: Adds natural sweetness and moisture. Great for breakfast baked goods.
- Applesauce or pumpkin puree: Lower calorie options that add moisture without much flavor.
- Nut butters: Adds healthy fats and flavor. Excellent in cookies and brownies.
- Extra eggs or egg whites: Provides moisture and additional protein.
Don’t just add water—you need ingredients with some fat or binding properties to prevent your baked goods from drying out during cooling.
Rule #3: Reduce Baking Time and/or Temperature
Protein powder causes baked goods to cook faster and dry out quickly at high temperatures. Use one or both of these strategies:
- Lower the oven temperature by 25°F (about 15°C): This allows more even cooking without overcooking the edges.
- Reduce baking time by 3-5 minutes: Start checking for doneness earlier than the original recipe suggests.
Whey protein browns very easily due to the Maillard reaction, so lowering temperature is especially important when using whey.
Rule #4: Increase Leavening Agents
Protein powder adds density. To maintain a light texture, boost your leavening:
- Add an extra ½ teaspoon of baking powder per cup of protein powder used
- For yeast breads, increase yeast by 25% and allow for longer rise times
- Consider adding a small amount of baking soda (⅛ teaspoon per cup of protein powder) if your recipe includes acidic ingredients like yogurt or buttermilk
Rule #5: Don’t Overmix
Overmixing develops too much structure in wheat flour and can make protein powder baked goods tough and rubbery. Mix all other ingredients first, add protein powder last, and stir just until combined. A few lumps are fine—they’ll disappear during baking.
Rule #6: Account for Sweetness and Flavor
Most flavored protein powders contain artificial sweeteners or sugar. Taste your protein powder mixed with a bit of milk—if it’s quite sweet, reduce the sugar in your recipe by 2-4 tablespoons. If it’s vanilla or chocolate flavored, you may not need to add vanilla extract or cocoa powder (or you can reduce the amounts).
Unflavored protein powder gives you the most control but requires that your recipe has enough flavor from other ingredients.
Common Mistakes to Avoid
Even armed with the golden rules, certain pitfalls trip up protein bakers. Here’s what to watch for:
Mistake #1: Using Too Much Protein Powder The temptation to maximize protein content leads many people to replace half or more of the flour with protein. The result? Dense, dry, crumbly baked goods that might meet your macros but don’t taste good enough to eat. Stick to the 1/4 to 1/3 substitution rule.
Mistake #2: Not Adjusting Liquid Enough Adding a tablespoon or two of milk doesn’t cut it. Protein powder is thirsty. Really thirsty. You need substantial additional wet ingredients—think ¼ to ½ cup. When in doubt, make your batter slightly wetter than feels right. It’ll firm up during baking.
Mistake #3: Forgetting About Fat Fats make baked goods fluffier and softer because they prevent flour from absorbing too much water. This is even more important with protein powder, which tends to dry when heated. Don’t skip or dramatically reduce the fat in your recipe. Use healthy options like nut butters, avocado oil, or even a bit of butter if it fits your goals.
Mistake #4: Expecting Identical Texture Protein baked goods have a different mouthfeel than traditional versions. They’re denser, sometimes with a slightly spongy texture. Brownies might be more cake-like. Cookies might be softer. This isn’t failure—it’s just different. Adjust your expectations and you’ll be much happier with the results.
Mistake #5: Skipping the Recipe Test Everyone’s protein powder is different. Whey concentrate behaves differently than whey isolate, and brand formulations vary. The first time you try a new protein powder in a recipe, make a small test batch. Note what works and what doesn’t so you can adjust for next time.
What You Can Make: A Tour of Protein Baking Possibilities
High Protein Breads
Bread is one of the more challenging protein baking projects because bread texture relies heavily on gluten development, and protein powder interferes with that process. That said, it’s absolutely doable with the right approach.
The key is combining protein powder with high-protein flour (bread flour) and adding vital wheat gluten to compensate for structure loss. A good formula: For every cup of protein powder, use 2-3 tablespoons of vital wheat gluten plus additional liquid (10-15% more water than normal).
Your protein bread won’t rise quite as high as regular bread, and the crumb will be denser—think of it more like a hearty, artisan-style loaf rather than a light sandwich bread. The payoff is 15-20 grams of protein per thick slice versus 3-4 grams in regular bread.
Protein bread also toasts beautifully and makes exceptional French toast. Store it in the freezer and toast slices directly from frozen for the best texture.
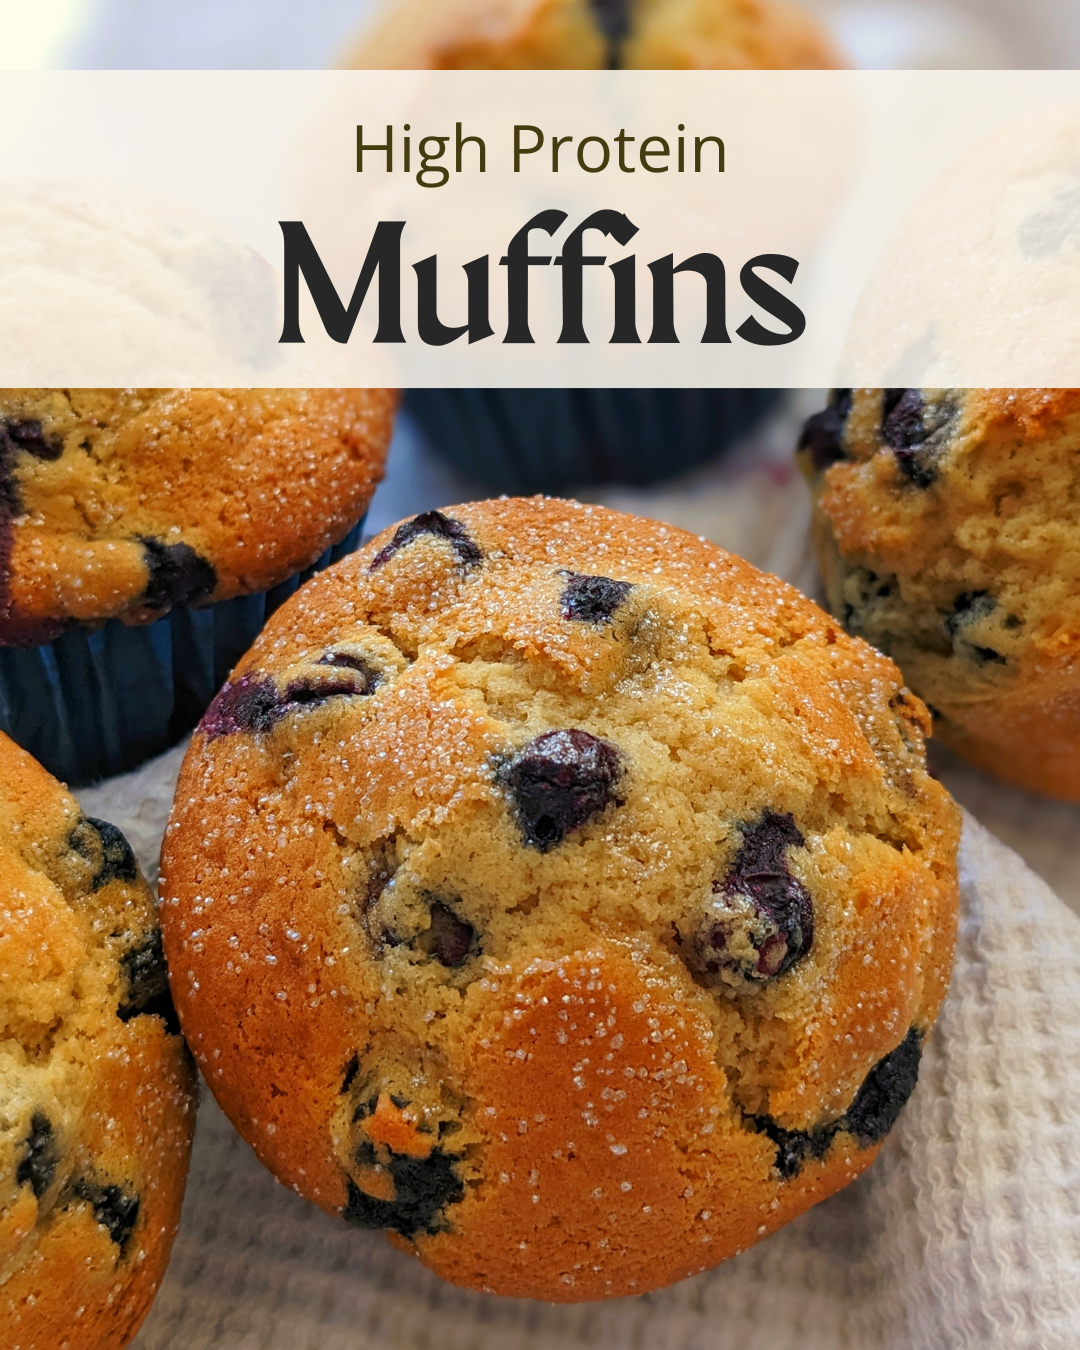
High Protein Muffins and Quick Breads
This is where protein baking shines. Muffins don’t require gluten development, they’re supposed to be dense and tender, and they freeze beautifully for meal prep.
A basic high protein muffin formula:
- 1 cup flour (oat flour, whole wheat, or all-purpose)
- ½ cup protein powder (whey or pea)
- 1½ teaspoons baking powder
- ¼ teaspoon baking soda
- ⅓ cup Greek yogurt
- 2 eggs
- ¼ cup milk
- 2 tablespoons oil or melted butter
- Sweetener to taste
- Flavoring add-ins
This base yields 12 muffins with approximately 12-15 grams of protein each. Mix in blueberries, chocolate chips, mashed banana, pumpkin and spices, or savory ingredients like cheese and vegetables.
Banana bread, zucchini bread, and pumpkin bread all adapt beautifully to protein powder addition. The naturally moist vegetables help counteract protein’s drying effect.
High Protein Pancakes and Waffles
Pancakes are arguably the easiest and most successful protein baking project. The batter is wet, cooking time is short, and the texture is supposed to be fluffy and tender—all things that work in protein powder’s favor.
Pea protein creates particularly fluffy pancakes, making it an excellent choice even for non-vegans. Whey protein works well too, creating slightly denser but still delicious results.
A simple formula: 1 mashed banana + 1 scoop protein powder + 1 egg + dash of cinnamon. That’s it. Seriously. Cook like normal pancakes. This makes about 4 small pancakes with 20+ grams of protein total.
For waffles, add a tablespoon of oil to the batter to ensure they release from the waffle iron easily.
High Protein Cookies
Cookies present a unique challenge because their texture is so variable—some are supposed to be crispy, others chewy, others soft and cake-like. Protein powder pushes cookies toward the softer, more cake-like end of the spectrum.
Rice protein works especially well in cookies because it creates a slightly crumbly texture that mimics traditional cookies better than whey or pea[9]. For chewy cookies, use casein or a casein blend.
The biggest cookie mistake: overbaking. Because protein powder cooks fast, cookies that look slightly underdone when you remove them from the oven will be perfect after cooling. Cookies that look done will be overdone.
Chocolate chip cookies, peanut butter cookies, and oatmeal cookies all adapt well to protein powder. Sugar cookies and delicate butter cookies are tougher—the protein powder interferes with their light, crispy texture.
High Protein Brownies and Bars
Brownies are ideal for protein baking because they’re supposed to be dense and fudgy. The key is using enough fat (from nut butter, oil, or butter) to maintain that rich, fudgy texture.
Adding zucchini to protein brownies helps moisturize the protein powder and keeps them from getting dry. You won’t taste the zucchini—promise. Black beans, pumpkin puree, and avocado also work as moisture enhancers in brownies.
Protein bars are trickier than brownies because they’re usually no-bake, relying on binding agents like nut butter, dates, or honey. Casein protein works best for no-bake bars because it doesn’t require heat to set up its binding properties.
High Protein Cakes and Cupcakes
Full disclosure: cake is the hardest thing to make with protein powder. Cakes are supposed to be light, fluffy, tender, and delicate—everything protein powder is not.
That said, it can be done. The secrets:
- Use a whey-casein blend if possible
- Replace only 1/4 of the flour (resist going higher)
- Use cake flour, not all-purpose, for the remaining flour
- Add an extra egg for moisture
- Use oil instead of butter (oil keeps cakes moister)
- Lower oven temperature by 25°F
- Frost generously—the frosting adds moisture
Chocolate and spice cakes handle protein powder better than vanilla or delicate flavors. The stronger flavors help mask any protein taste, and these styles are meant to be denser anyway.
Getting Started: Your Protein Baking Pantry
Building a well-stocked pantry makes protein baking much easier and more successful. Here’s what to keep on hand:
Proteins:
- 1-2 protein powders: Start with vanilla whey (or vanilla pea if plant-based) plus either chocolate whey/pea or unflavored
- Vital wheat gluten (if making breads)
Flours:
- Bread flour (for protein breads)
- Oat flour (make your own by blending oats)
- Almond flour (adds moisture and fat)
- Whole wheat flour or all-purpose flour
Moisture Enhancers:
- Greek yogurt (plain, full-fat or 2%)
- Natural nut butter (peanut, almond, cashew)
- Unsweetened applesauce
- Canned pumpkin puree
- Bananas (buy them at different ripeness levels)
Leavening and Structure:
- Baking powder (aluminum-free)
- Baking soda
- Eggs (or flax/chia eggs for vegan)
Fats:
- Coconut oil or avocado oil
- Butter (if using dairy)
- Olive oil (for savory baking)
Sweeteners:
- Natural sweeteners like honey, maple syrup, or coconut sugar
- Granulated sweetener (sugar, monk fruit sweetener, or erythritol)
- Unsweetened cocoa powder
Flavor Enhancers:
- Vanilla extract
- Cinnamon and other spices
- Unsweetened cocoa powder
- Chocolate chips (dark, semi-sweet, or sugar-free)
Converting Your Favorite Recipes
Ready to take a regular recipe and make it protein-friendly? Here’s your step-by-step conversion guide:
Step 1: Identify the flour content. If it’s less than 1 cup total, the recipe might be too small to accommodate protein powder successfully. If it’s 1½ cups or more, you’re good to go.
Step 2: Replace 1/4 to 1/3 of the flour with protein powder. For a recipe calling for 2 cups flour, replace ½ cup (1/4 substitution) or ⅔ cup (1/3 substitution).
Step 3: Add moisture. Add ¼ cup of Greek yogurt, applesauce, or mashed banana for every ½ cup of protein powder you’re using. If the recipe already includes these ingredients, increase them by this amount.
Step 4: Boost leavening. Add an extra ½ teaspoon baking powder.
Step 5: Adjust sweetness. If using flavored protein powder, reduce sugar by 2-3 tablespoons.
Step 6: Modify baking. Lower oven temperature by 25°F or reduce baking time by 3-5 minutes. Check for doneness early.
Step 7: Document everything. Write down exactly what you did so you can replicate success or adjust failures next time.
Master Recipe: The Everything Protein Muffin
Here’s a flexible master muffin recipe that works with any protein powder type and accommodates dozens of flavor variations. This recipe makes 12 muffins, each containing approximately 12-14 grams of protein.
Ingredients
Method
- Preheat oven to 350°F (175°C). Line a 12-cup muffin tin with paper liners or spray generously with non-stick spray. This is important—protein powder gets sticky, so paper liners should be sprayed even though regular muffins don't usually need it.
- In a large bowl, whisk together all dry ingredients: flour, protein powder, baking powder, baking soda, salt, and cinnamon. Make sure the protein powder is well distributed with no clumps.
- In a medium bowl, whisk together all wet ingredients until smooth: yogurt, eggs, milk, melted oil, honey, and vanilla. The mixture should be completely combined with no streaks of yogurt.
- Pour wet ingredients into dry ingredients. Using a spatula or wooden spoon, gently fold together until just combined. The batter will be thick—thicker than regular muffin batter. This is normal. Don't overmix; a few small lumps are fine. If the batter seems dry and crumbly rather than thick but scoopable, add 1-2 tablespoons more milk.
- Gently fold in your chosen mix-ins. Distribute evenly through the batter.
- Divide batter evenly among the 12 muffin cups, filling each about ¾ full. The batter won't spread much during baking, so you can fill them generously.
- Bake for 18-22 minutes. Because of the protein powder, these bake faster than regular muffins. Start checking at 18 minutes. They're done when a toothpick inserted in the center comes out with just a few moist crumbs (not wet batter). The tops should be golden and spring back lightly when touched. Do not overbake—it's better to slightly underbake than overbake protein muffins.
- Remove from oven and let cool in the pan for 5 minutes, then transfer to a wire rack. The muffins will firm up as they cool. When they first come out, they might seem too soft—that's okay.
- Store cooled muffins in an airtight container in the refrigerator for up to 5 days, or freeze individually wrapped for up to 3 months. Thaw overnight in the fridge or microwave for 30-45 seconds from frozen.
Notes
- Using oat flour (just blend oats until powdery) increases fiber and creates a heartier texture
- For dairy-free, use plant-based milk and substitute the yogurt with an additional ¼ cup milk plus 2 tablespoons ground flaxseed (for structure)
- These muffins taste better the next day after flavors have melded
- For sweeter muffins, sprinkle a little coarse sugar on top before baking
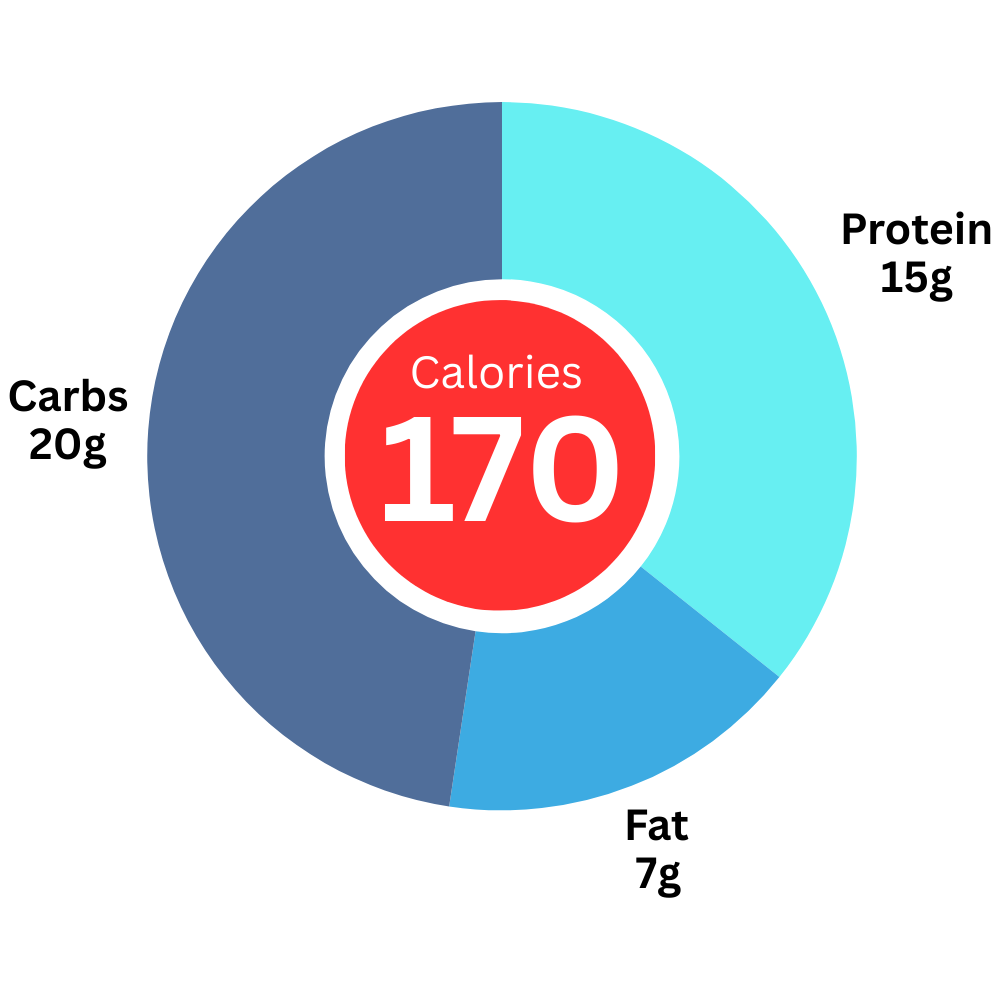
Approximate Nutrition Per Muffin
Your Next Steps: From Beginner to Confident Baker
If you’re new to protein baking, here’s the path I recommend:
Week 1: Start with Pancakes Make the 3-ingredient banana protein pancakes (mashed banana + protein powder + egg). Success rate is nearly 100%, and it builds confidence. Try it with both whey and pea protein to see how different proteins behave.
Week 2: Master Muffins Use the master muffin recipe from this guide. Make one batch exactly as written, then experiment with one variable (different mix-ins, different protein powder, different sweetener). Muffins are forgiving and freeze beautifully.
Week 3: Try Cookies Adapt your favorite cookie recipe using the conversion guidelines. Start with a simple recipe—chocolate chip or peanut butter work best. Don’t be discouraged if the first batch isn’t perfect; make notes and adjust.
Week 4: Tackle Brownies Brownies are more forgiving than cookies because they’re supposed to be dense and fudgy. This is where you’ll really see how protein powder can work in your favor.
Beyond: Experiment Once you’ve mastered these basics, try quick breads (banana bread, zucchini bread), protein pizza crust, protein donuts, or even bread if you’re ambitious. Each success builds your intuition for how protein behaves.
The most important thing? Don’t expect perfection on the first try. Protein baking has a learning curve. Keep notes on what works and what doesn’t with your specific protein powder and oven. Every “failure” teaches you something useful.
Building a Sustainable Protein Baking Practice
Here’s the reality: If protein baking is complicated and time-consuming, you won’t do it consistently. The goal is to integrate it into your routine so seamlessly that you always have high-protein snacks and breakfast options on hand.
Batch Baking Strategy Set aside 2-3 hours every couple weeks for a baking session. Make:
- 24 muffins (two flavors, one batch each)
- One batch of cookies or brownies
- One loaf of protein bread or banana bread
That gives you 2-3 weeks of breakfasts and snacks. Freeze half immediately, keep half in the fridge. When your fridge stock runs low, pull items from the freezer.
The Pantry Method Keep your dry ingredients pre-mixed in jars. Label them clearly:
- “Protein Muffin Dry Mix” (flour, protein powder, baking powder, baking soda, salt, spices)
- “Protein Pancake Mix” (similar blend)
When you want to bake, just add wet ingredients. This reduces the barrier to baking on busy mornings.
The “It’s Already Out” Principle When you’re already baking something, make protein muffins too. The oven’s already hot, you’re already making a mess—might as well double your output. This is especially useful during meal prep sessions.
A Final Thought on Protein Baking Philosophy
High protein baking isn’t about achieving perfection or making your protein cookies identical to Famous Amos. It’s about finding a middle ground where you’re enjoying delicious baked goods that also serve your nutritional goals.
Some days, regular cookies are exactly what you want, and that’s fine. Other days, a protein muffin that keeps you satisfied for four hours and helps you hit your macros is exactly right. Both have their place.
The point of learning protein baking isn’t to never eat “regular” baked goods again. It’s to expand your options so you’re not choosing between your goals and your enjoyment. With protein baking, you can have both—maybe not simultaneously in every single bite, but pretty close.
Start with one recipe. Master it. Then expand. Before you know it, you’ll be the person everyone asks for protein muffin recipes, and you’ll have an intuitive sense of how much liquid to add and when to pull things from the oven. That’s when protein baking becomes truly sustainable and enjoyable.
The world of high protein baking is yours to explore. Whether you’re here for muscle gains, satiety, or just curiosity about what’s possible with protein powder, there’s a place for you at this table. Welcome, and happy baking.
Still Wondering? Your Questions Answered
References
[2] Phillips, S. M., & Van Loon, L. J. (2011). Dietary protein for athletes: from requirements to optimum adaptation. Journal of Sports Sciences, 29(sup1), S29-S38.
[3] Mamerow, M. M., et al. (2014). Dietary protein distribution positively influences 24-h muscle protein synthesis in healthy adults. The Journal of Nutrition, 144(6), 876-880.
[4] Smithers, G. W. (2015). Whey-ing up the options–Yesterday, today and tomorrow. International Dairy Journal, 48, 2-14.
[5] Holt, C. (2016). Casein and casein micelle structures, functions and diversity in 20 species. International Dairy Journal, 60, 2-13.
[6] Gorissen, S. H., et al. (2018). Protein content and amino acid composition of commercially available plant-based protein isolates. Amino Acids, 50(12), 1685-1695.
[7] Day, L., et al. (2014). Proteins from land plants–Potential resources for human nutrition and food security. Trends in Food Science & Technology, 32(1), 25-42.
[8] Young, V. R. (1991). Soy protein in relation to human protein and amino acid nutrition. Journal of the American Dietetic Association, 91(7), 828-835.
[9] Wang, X. S., et al. (2008). Characterization, amino acid composition and in vitro digestibility of hemp (Cannabis sativa L.) proteins. Food Chemistry, 107(1), 11-18.
[10] Evenepoel, P., et al. (1998). Digestibility of cooked and raw egg protein in humans as assessed by stable isotope techniques. The Journal of Nutrition, 128(10), 1716-1722.
Related Articles
For deeper dives into specific aspects of protein baking:
- How to Bake with Protein Powder: Substitution Guide & Conversion Chart – Get the technical details on flour-to-protein ratios, moisture compensation formulas, and a downloadable conversion chart.
- 7 Protein Baking Mistakes (And How to Fix Them) – Troubleshoot common problems like dry texture, dense results, and strange flavors with specific solutions.
- Best Protein Powder for Baking: Whey vs Pea vs Casein (2025 Comparison) – Side-by-side comparison of protein types with detailed pros, cons, and recipe recommendations for each.
- High Protein Bread: Ultimate Guide + Master Recipe – Master the art of protein bread with techniques for proper rise, crumb structure, and 20g protein per slice.
- High Protein Desserts Compared: Cookies, Brownies, Muffins & Cakes – Quick reference guide comparing protein content, difficulty level, and best protein types for different desserts.
- High Protein Muffins for Breakfast: Meal Prep Guide – Complete meal prep strategy with 5 flavor variations, storage tips, and batch baking workflow.
- Plant-Based Protein Baking: Complete Guide to Vegan Protein Sources – Everything you need to know about using pea, rice, hemp, and soy proteins, plus egg replacements and flavor solutions.
- Does Baking Destroy Protein? The Science of Heat + Protein – Explore the science of protein denaturation, what happens at different temperatures, and what research really shows about cooking protein.
What’s your next baking project? Whether you’re starting with pancakes or jumping straight to bread, remember: every baker started with a first attempt that probably didn’t turn out perfectly. The difference between them and everyone else? They tried a second time. You’ve got this.